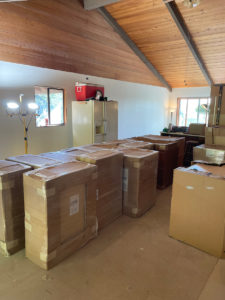
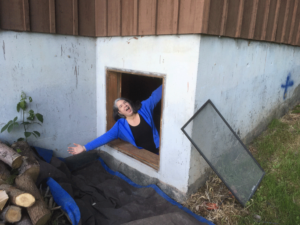
Fresh out of the box, but still in the dining room. The big hole here is where one of the ovens will live.
Cupboards emerge from the boxes they’ve lived in for the past year.
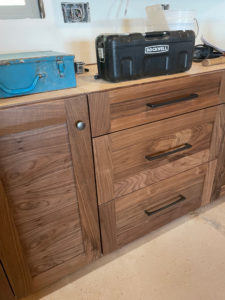
This one will be next to the cook top. There is a matching mate for the other side. Oh, and yes, you counted right: five drawers!
Some assembly is required.
Oven, oven, then the pantry is on the far right. The large oven is a “regular” oven. The small oven is a steam oven. I am so going to have to try my hand at making sour dough bread!
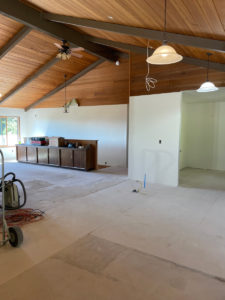
The basic layout, not including the peninsula where the cook top will live. The gap to the left is where the dishwasher will go. The uppers over on the right are the only uppers in the entire kitchen. So far. Once we get around to creating the breakfast nook there will be a couple small uppers there, too, but that’s a future project. When we designed the kitchen we were going to enclose the top of the uppers, so that neither Ansel nor dust could land up there, but now that it’s in? Oh my. No. I don’t think so. It’s so pretty the way it is!
Here’s the peninsula that will be the home of our lovely cook top. Does it seem like there are a lot of drawers there? (Maniacal laugh deleted.) It’s because there are a lot of drawers! A total of ten drawers, five to each side, and the four more in the middle. Those four big drawers will be home to most of our pots and pans. I don’t know if the biggest stock pot will fit, but I think that most everything else will. Holy cow. And what about those ten smaller drawers? Spices in one (or more), overflow utensils in another, hot pads, I’m thinking maybe towels, and we might just end up with multiple lid drawers, so that we can sort them.
The back of this peninsula will eventually match the rest, but that bit cannot be installed until after we have the floors in. Ditto with all the toe kicks. Toe kicks throughout will be installed later.
Knobs and handles
Our kitchen designer likes to mix things up, so we have coordinating knobs and pulls. The cupboards have knobs, and the drawers have pulls. What’s extra cool as there are big versions of these pulls that will go on the refrigerator and dishwasher doors. I didn’t know they could do that!
Countertops
What is this, you ask? This is a part of a super high tech method of measuring for kitchen counters. He takes this back to the shop, finagles the file a bit, loads the counter blanks onto the cutting widget, then goes off to hit some balls at his local driving range. Measurements happened on Friday afternoon.
Master laundry closet
If you recall, when we bought our house the door leading from the master bedroom to the master bath was installed too close to the counter to open fully. Yes, for more than 40 years people had to deal with banging the door against the counter. On advise from our kitchen designer, we removed the door, cut down the one wall to pony height, and framed in for a pocket door. This added about 3 square feet and a lot of elbow room to the bathroom. But it also gave us a weird gap between the shower and the pocket door. So we filled it. We filled it with a cabinet that matches those in the kitchen. Wondering what that weird hole is in the bottom? That’s a laundry shoot! Clothes will drop nicely down into a cupboard in the laundry room. No more running downstairs with a full laundry basket (too bad there’s not a lift to take the closet back up!). There’s currently a stack of extra shelves in the upper part of the cupboard. One of them will move down to above the shoot, and the other will move up. Oh yeah. There’s a pullout in there. And the knobs match those in the kitchen. So much fun.
In case you were wondering
The wood is walnut, sealed, but not stained. The walnut makes my heart go pitty-pat.
Meanwhile, downstairs
Here I’m in what will be our library, and I’m looking at the closet under the stairs, a.k.a. the network closet. I just love how all those angles turned out! Oh, plus you can see the stairs going up. That doorway used to have a door in it. So much better without.
The inside of the entire house has been painted! Well, except for the bathrooms, which are my job. Last week we went from bare walls with tape and mud on them to textured, painted walls. Well. There’s another except thing…
Before painting began, I was told to get ten gallons of paint to start with. Didn’t seem like much, but you have to start somewhere, right? Holy cow! Have you painted anything recently? That ten gallons of paint cost $500! Talk about sticker shock! Can’t move forward without paint, though, so here we go. Our painter ran out of that without too much trouble, so I was sent over to the paint store to get five more gallons. Oh ha ha ha. Yeah. Last Friday was fun. Our local store was out of paint. Have you ever heard of such a thing? A paint store without their most common paint base? Anyway, the closest store with the paint in stock is in Vancouver, so off I went. The store is half an hour away from home, so I enjoyed a nice little drive, picked up the paint, and dropped it off at our house. That was early afternoon. At about 4 pm Dave texted me. We were out of paint. Again? Already? Well, I wasn’t driving to Vancouver again on Friday, not at that hour (the longer I live up here the less patience I have for traffic). We fetched the paint on Saturday, so all was well. The last of the painting was done on Monday morning, fairly early.
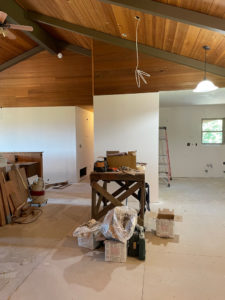
And here we are! The rest of Monday we worked at cleaning up the debris left from hanging rock, mudding it, etc. We concentrated our initial efforts in the kitchen, to be ready for the cabinet installer. Dave also re-staged all the boxes with the cabinets in them, so that they’re easy to get to.
Painted!Boxes staged for easier access.
In case you’re wondering, I bought a total of 20 gallons of paint for the whole house (excluding bathrooms). Most of our ceilings are cedar, so no paint there. Our painter used an airless sprayer, which covers well with less paint, and is super fast.
When will our cabinets be installed, you ask? That’s a very good question. We were going to try to aim for Thursday or Friday this week. Then a tree fell on the installer’s house! Luckily, everyone is apparently just fine, but instead of installing cabinets, the guy is trying to get an electrician out to his house, as the tree took out the power line. Obviously no idea how long he’s going to be sidetracked getting things fixed at home, or stable anyway. Keep your fingers crossed. With any luck at all the next time I post will be soon, and it’ll include our beautiful cabinets installed in the kitchen.
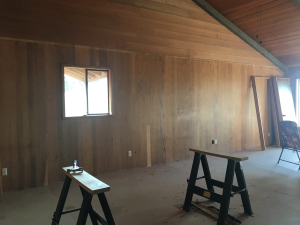
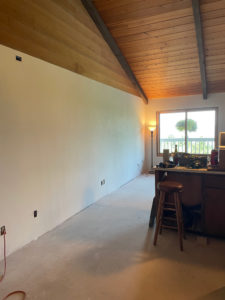
Okay. It’s not sudden. It’s far from sudden. But it feels sudden, because the difference is so amazing. When we bought this house every single wall was paneled except for the bathrooms, and the inside of one closet. In between we had walls that we could look through for the longest time (standing in the dining room we could look through the guest room, through the master bedroom, and out the window on the north side of the house), now the walls are covered again but with sheetrock instead of paneling, and the outside walls actually have new insulation instead of 47-year-old stuff filled with dirt, dead bugs and mouse carcasses (ew). When I was at our house yesterday I walked in the door, and my brain exploded. It is looking SO good! We haven’t even painted the walls yet, and suddenly they’re fabulous.
I tried to find “before” pictures that were taken when I standing in about the same spot as I was yesterday. There’s still plenty of construction mess, but that part doesn’t count. Look, look, look, look! OMG.
Living room, before:
Now:
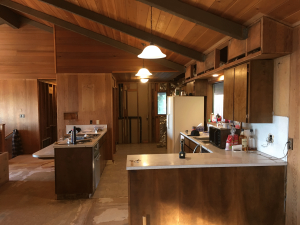
Kitchen, before:
Now:
Normally, I’m a “it’s wood, leave it there” sort of a person. But the 47 year old paneling didn’t look as good up close as it does in these photos. If time alone hadn’t been bad enough, the house was a rental for a decade or two, and there were a myriad of holes dotting the walls, many small, but some quite large (Dave enjoyed getting rid of the 70s era intercom system, but that left gaping maws in the paneling all over the house). Plus, see how the paneling that’s above the eight-foot mark stands out now? Before it was lost. Now it’s a feature. Be still my heart.
Our last post here was a catch-up post that I wrote in early October 2020, and the post didn’t even catch us up to the then current state of progress on our remodel. It’s been forever, and a lot has happened since then. Frankly, one of the things stopping me from updating the blog is pictures. Between us there are many hundreds of photographs to slog through. I’m not going to do it. The photo slogging. Not today, anyway. I’m apologizing up front for the limited number of photos. It’s come down to this: I need to either process all of those (expletive deleted) photographs, or I need to blog without (most of) them.
The other thing is how to organize all of the information and events, and get them all to you in a way that makes sense. I’ve been thinking about it, and I think that if I break things down by month that will be the easiest way to go. We have email messages and Facebook history that I can use for the order of things. Though written in October, my last post caught us up as far as early August last year, with most of the windows being installed, the replacement of the beams in the kitchen ceiling, and graveling the driveway. Next up: the rest of August. Oh, and though I was going to write entire paragraphs for all of this, get Dave to proof it, and any number of other things, I’m not going to. I’m going to leave it as a bullet list, and actually get this update out today! Here goes:
August 2020
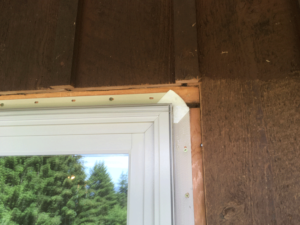
North-facing kitchen window re-framed for larger glass
Window installed
September 2020
Removed remains of double sticky tape from lower bath walls
Dave continues to take the house apart
October 2020
Building starts in earnest: the new laundry room is framed in
November 2020
Removed wallpaper border from half bath
Copper pipe removed
Plumbing rough in done, except for a few things that they returned to do, and a number of things they never did
Inspector passes the plumbing… why?
December 2020
Electrical rough in starts December 9, and turns into a much larger job than originally planned, as the original wiring in parts of the house were so weirdly done, and so far away from code that it’s amazing the house didn’t burn down decades ago
January 2021
Electrical rough in passes inspection—hooray!
Maple tree near house removed, so very very sad, but it had to come out as a significant percentage of the trunk was hollow
February 2021
We realize that the plumbers didn’t do more things than we’d thought… like they missed plumbing the shower in the downstairs bathroom, and the ice maker in the kitchen has no water, and a large list of other things; if you’re local and want to know which plumber to avoid, we’ll be happy to tell you
March 2021
Heavy rain shows that the fix to the laundry room wall isn’t 100%
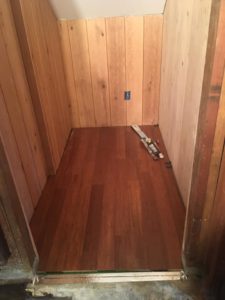
Network closet floor installed, and it’s gorgeous; that same floor will be installed throughout the house, except in bathrooms and laundry room
April 2021
Roll up garage door installed in barn
Fixed laundry room back wall leak problem but good; work done by Rock Solid Waterproofing
May 2021
Dave begins pulling network wiring throughout the house
Master bath linen closet delivery
Removed remaining insulation from entire house
Same guy who laid the floor in the network closet also fixed the two toilets that the journeyman plumber didn’t know how to deal with (there are no words for that original plumber that make him sound good)
New plumber found to fix original plumber’s mistakes, then he leaves for a three-week vacation so work is put off until mid June
Rose hedge falls over
Insulation hung upstairs
June 2021, so far
Insulation hung thought most of the downstairs
Insulation inspection passed for upstairs; downstairs pending
Finally finished painting the master bathroom; painting the half bath begins
Sheet rock going up!
Climbing rose put on trellis
Work cutting fallen roses back begins; this is going to take me a while (there are 17 bushes in the hedge!); the worst of the fallen have been cut back, and the remaining canes look great
And now you have read the list, and we are all caught up. Basically. I don’t even want to tell you when we think we might be able to move into our house, as I don’t want to jinx it. Stay tuned. I’ll leave you with this photo of Ansel. He is extremely good at being cute.
Today I’m playing a little catch up. Again. Neither of us has touched this blog since May. I can’t believe it’s been that long! I’m not even going to try to get us caught up to current today, but I’ll get us a bit closer.
Before I get started, I’m going to answer this burning question that I’m sure is racing through your mind right now: No, we have not been able to move into our house yet. We celebrated the one year anniversary of buying our forever home on September 24, by drinking some lovely Prosecco at the rental house. Sigh.
Anyway, let’s talk about a couple things that have happened.
Windows
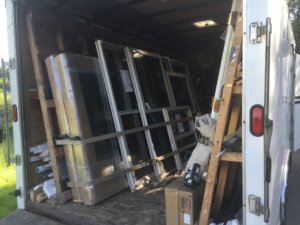
Back in November last year we ordered some windows for our house. I don’t know if you’ll recall, but the front windows in the living and dining rooms were a mess, all scratched up, one of two panes missing, wouldn’t open, or all three. These are the view windows across the front of the house, looking out across the balcony and to the stunning view beyond. We went all out for these four. We also ordered windows for my office, the kitchen, and the breakfast nook. Two of these projects, my some-day office and the breakfast nook, have to be postponed. We could certainly store all these windows for some unknown period of time. As it turns out, we were able to use the windows I’d ordered for my office downstairs. I’ll get more into that in a bit.
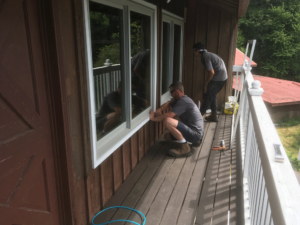
On window install day, I got to our house pretty much exactly when the window guys did. In fact, I followed them up the driveway. It was slow going. Their truck did not like the combined weight of the trailer with all the windows in it and our hill. We all made it, however. Right away they set up a spot on the driveway to work, and started unloading glass.
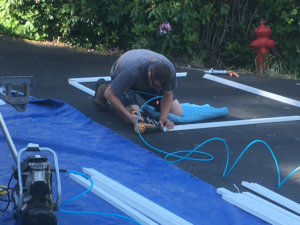
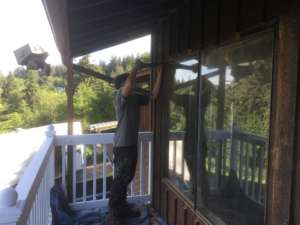
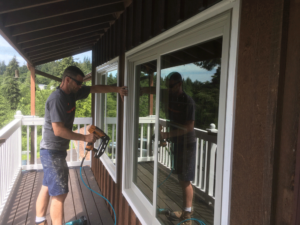
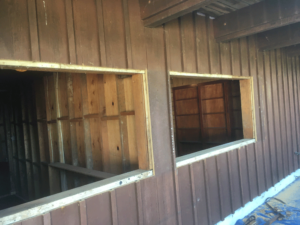
They started with the hardest-to-install windows first: the living and dining rooms. Naturally we begin by removing the old glass and frames.
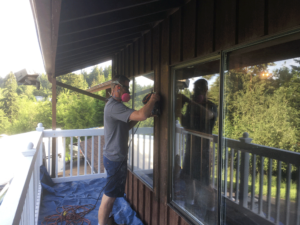
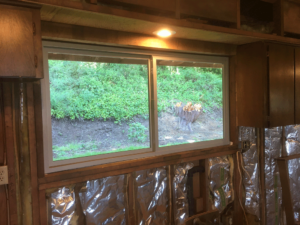
Then put the new windows in. Ooh, they’re so very pretty! And they actually open. What a concept.
In their “spare” time, they also replaced the little window in the TV room. I’d originally ordered this little square window for the kitchen, to replace a fixed window over what will eventually be the coffee bar. However, we discovered that the square window wouldn’t fit, and ordered a window of the correct size for the kitchen. That left this square one to go somewhere else. Luckily, there are two other square windows of exactly the same size, one upstairs in the living room overlooking the barn, and one downstairs in the TV room. We are planning on eventually replacing the little window in the living room with a door to lead out to a deck we haven’t built yet. That means that the only place left for this one is the TV room. Okay. The TV room it is! I’m so very glad I had the forethought to match the size of this new window to those a couple of existing windows. Silly girl
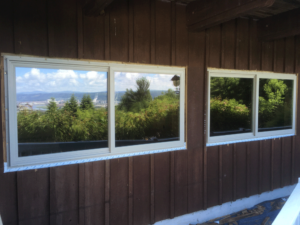
They replaced the living room, dining room, and TV room windows on Friday. They returned on Monday to finish up. On Monday this old thing that looked horrible was scratched all up, and was difficult to open…
was replaced by a new beauty that is the opposite in every regard.
The windows I ordered for my office were, once again, the same size as a number of windows that are already in the house. For symmetry. I don’t know about you, but having a bunch of windows leaning against walls and in the way seems like a recipe for disaster. Instead of saving these three windows for my some-day office, we used them to replace horrible original windows downstairs across the front of the house. Ta da! The windows after the glass was removedThe new windows
We do still have one large window, and one sliding glass door that we have to store somewhere out of the way, but that’s only two windows, which is much better than storing a total of six of the things. Whew.
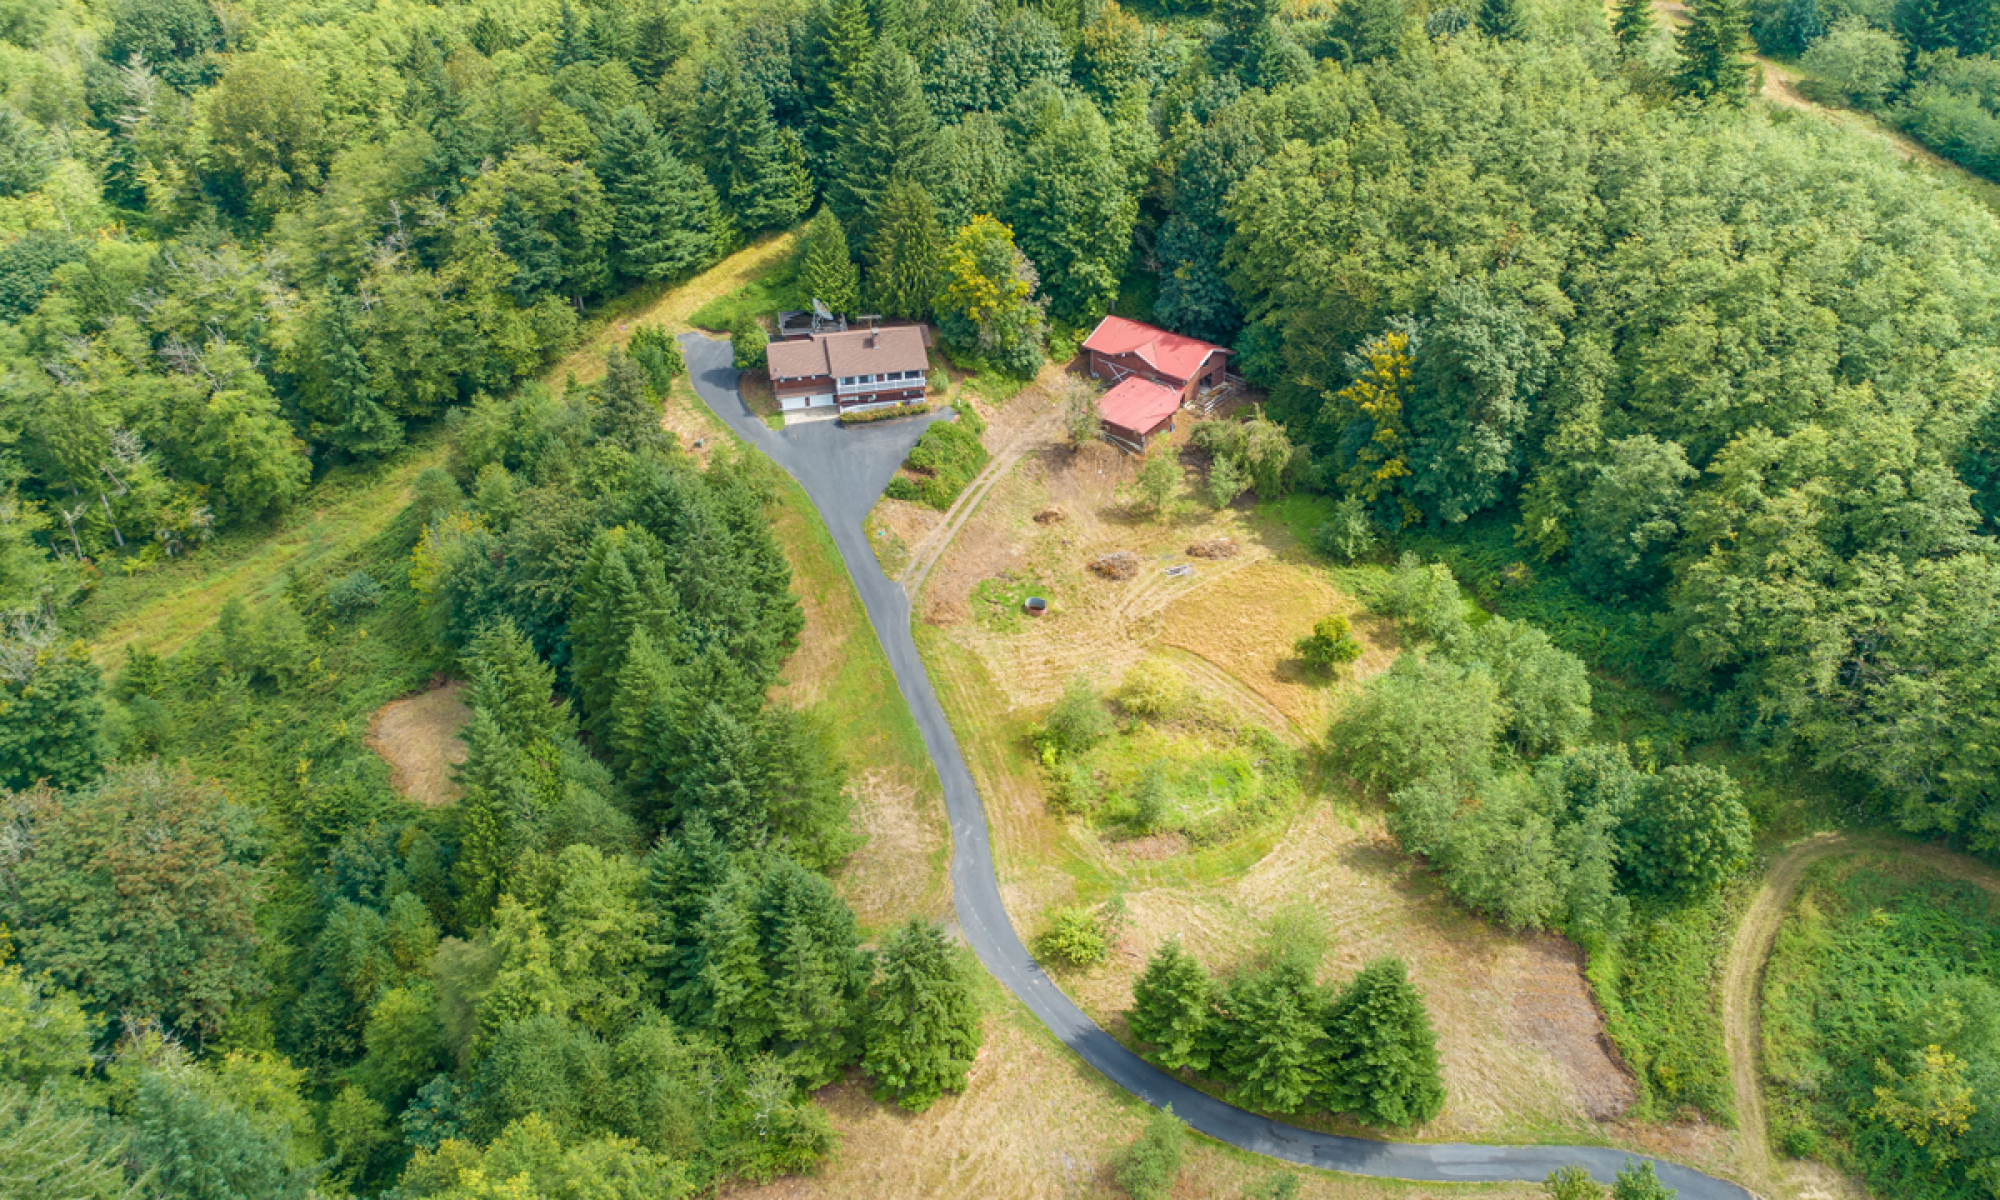
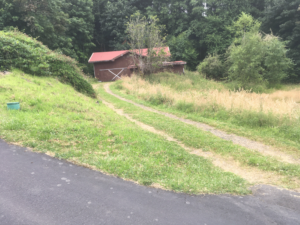
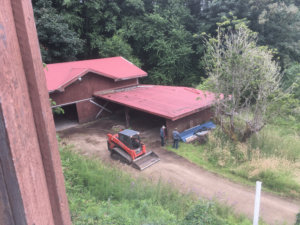
Driveway to the barn
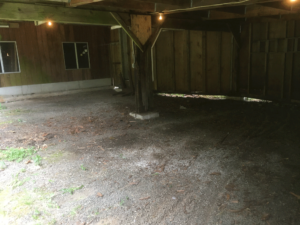
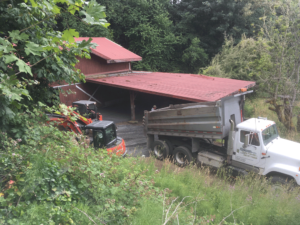
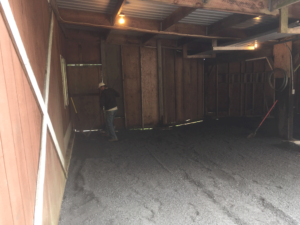
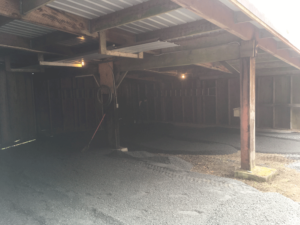
We had originally planned on pretty much ignoring the driveway shooting off to the barn for some time. We were talking to the gravel guys about the gravel we’d need for under the propane tank (this is a different story, and not one I’m going into today). He couldn’t help but notice the disaster of our barn driveway. He happened to mention (cough) that having gravel work done costs less if you have multiple jobs done at one time; instead of doing one this year, and another next year, it’s far cheaper to do them all this year. We had the guy bid for just the gravel under the propane tank, and also to patch the scar in asphalt left from repairing the line to the septic tank from the house, and graveling that secondary driveway. In the end, we did the obvious thing, and saved ourselves some cash by spending more now, and getting all three projects done at one time. This is how it looked earlier in the day before the work started. Inside the now empty carport
The day before all this work was to happen Dave and Grant, our guest from SoCal, moved everything out of the carport to behind the barn where it wouldn’t be in the way. I cannot tell you how glad I am that Grant was here at that time. Not only did he love to help do this, as well as a bunch of other things, but we had so much fun while he was here. Bonus: Grant got to see the gravel work done. The two of them took a bunch of videos on Gravel Day, but the editing that was supposed to happen to them hasn’t yet, so those videos are not included here. Not yet. Hopefully one day they will be.
Anyway… Dave went out to the house early, before Grant was fully mobile (he’s 18, so he sleeps a lot), so I took Grant over a tiny bit later. Turns out Grant and I arrived just in time to not be able to go up the driveway in the car. It was blocked by the big stuff getting staged down below. Grant gleefully walked the ¼ mile up the road, and I ran errands. The heavy equipment arrives
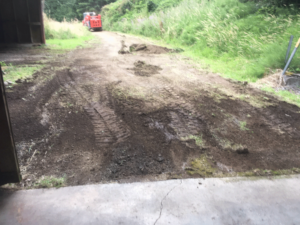
Now we start clearing the driveway of pretty much everything.
This last driveway destruction picture shows them cutting a wider opening to this driveway. Dave’s intention was to make it wide enough that he could turn onto this secondary driveway when going between the house and barn. Well… turns out that my little car is the only one that can make this turn. We do have some extra gravel, though, and Dave hopes to use it at some point to widen this curve a little more.
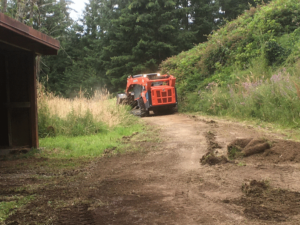
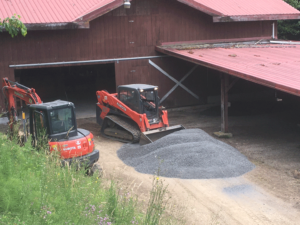
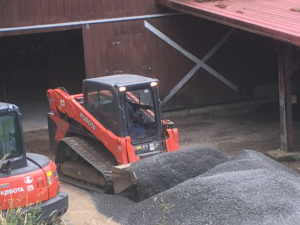
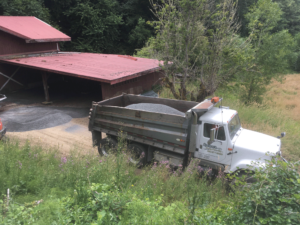
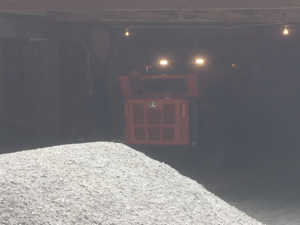
Gravel delivery…
Spreading the gravel…
It still amazes me, after a lifetime of watching roadwork being done, how much can actually be accomplished in a single day. The finished driveway to the barn is a thing of beauty. Apparently, for now, you’re simply going to have to believe me. I don’t seem to have a photo of it all done! LOL Egads.
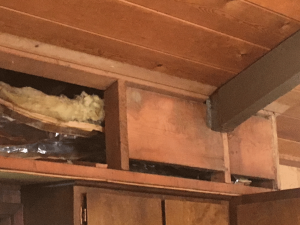
Beams
We’ve told so many people about the three beams in the kitchen that I don’t remember if we’ve written about it here or not. The ceiling over the living room, dining room (I almost typed “diving” room; wouldn’t that be fun!), and kitchen is vaulted. Like everything else, it’s covered with cedar, finished with big open beams that hide the seams. Gorgeous! It’s really lovely. The one thing about it, though, is that the way the house was built all of those beams start at the peak, and run to the outside walls… except for three of them in the kitchen. These final three beams, instead of being supported by the exterior studs, were held up by… egads. I can hardly say it. Well, here’s a picture. The three beams did not extend all the way to the exterior studs, but instead were supported by the soffit over the kitchen cupboards, which in turn was held up by the cupboards. Who thinks up these things? Why would you do this? Why was this considered to be a good idea? The mind reels. Closeup
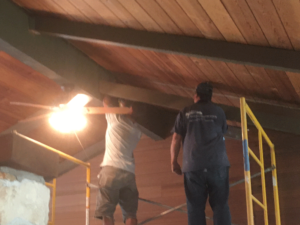
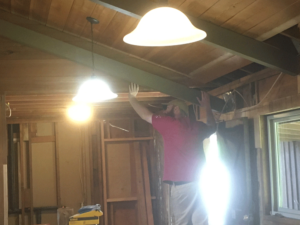
We bought three 20-foot, kiln-dried beams. Dave cut a sample of the old stain off of one of the beams to be replaced. Grant and I took it over to Sherwin Williams, and had them match the color. They did an amazing job of it, too. I put several coats on all sides of all the beams before Beam Replacement Day. The contractor brought over a bit of portable scaffolding, took down the first beam, replaced it with the new one, and so on.
And ta da! They’re gorgeous. Don’t look too closely, as the old beams are all rough-cut timber, and the new ones are not, but other than that they look like they were always there. It’s so nice to not have to worry about one of them falling on my head.
Closing
There’s more, a lot more, but this is all I have for you today. The sun is coming around the corner of the house, and is now shining in the window, which means it’s time for me to quit my desk until tomorrow.